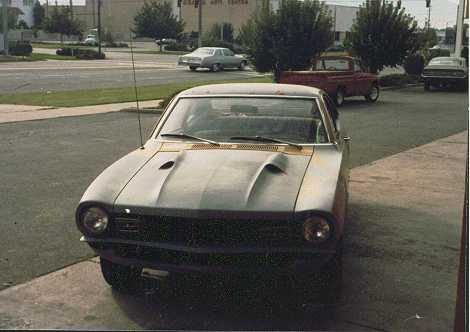
When I was last driving the car regularly in 1984, I was working on the body. Though in great basic condition, it needed a lot of detail body
work to straighten out the factory flaws. Note that the Grabber hood has been already customized.
It was quite a bit of work to correct the poor roof-to-quarter panel interface the lead work on this car was pretty bad! Still, hammer
and dolly work, a little bondo and a ton of block sanding solved the problem. At this point, the valence has also been welded to the rear quarter panels, and a dual outlet flare has been added to the
passenger side of the rear valence so that a full-twin exhaust system can be installed. The car here sits in front of a Master Muffler store where a full, genuine stainless steel exhaust system was added, along
with stainless Turbo mufflers -- all of which were hooked up to the now-discontinued Clifford Engineering true twin exhaust header system (three cylinders to each outlet).
 |
Right after the Clifford dual outlet headers (3 cylinders to an exhaust system) were installed and connected to a true dual exhaust system
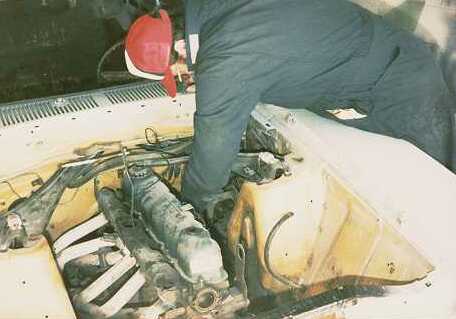
(lightly bolted together because it was removed for restoration), my first mechanic, Bill Holmied, and I started to tear the car apart. Yeech! This was quite a mess! Check out the exhaust system!
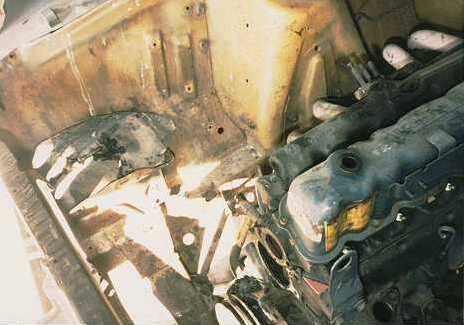
After the removal of the engine and all suspension components, the ugly and thankless job of cleaning up the engine compartment for
paint started. Fortunately, the car had only minimal rust (just in the lower rear quarter panels, just behind the wheel).
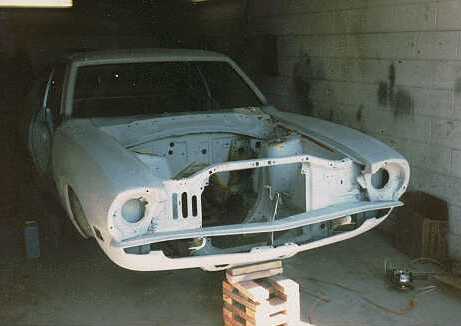
I believe in tearing down a Maverick to do a proper restoration. In this 1986 shot, the car has been spot primed and is proceeding toward
paint. Note that the front fenders have been welded to the front valence.
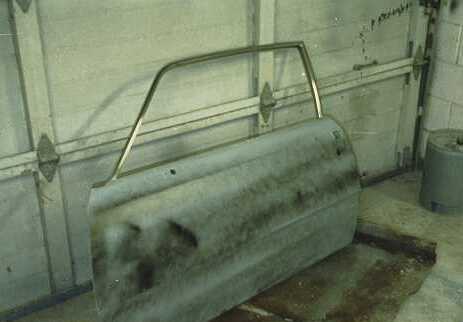
The doors were extensively worked to get out all the small dings and surface imperfections. Here, a fresh guide coat has been applied.
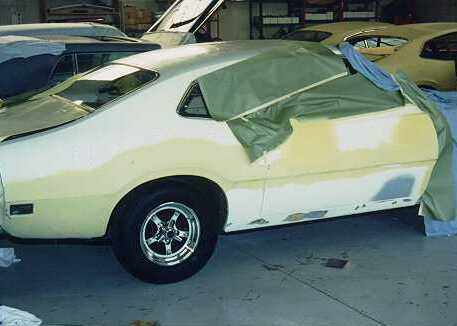
The car was painted mid-sixties Ford Colonial White. Unfortunately (or fortunately, depending on your point of view!), I didn't like the first
paint job, and I didn't like the original LDO side moldings that I had installed after the first paint job. So, off they came, and I blocked down the entire car again! Man, talk about work! In this shot, PPG
catalyzed primer has been applied.
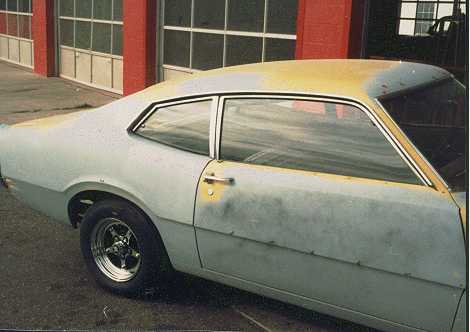
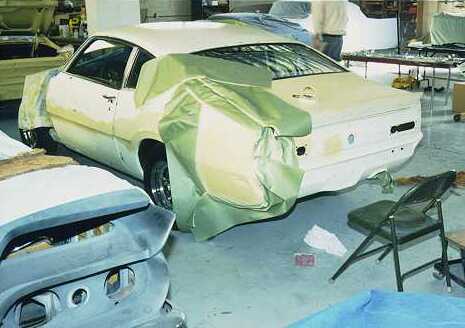
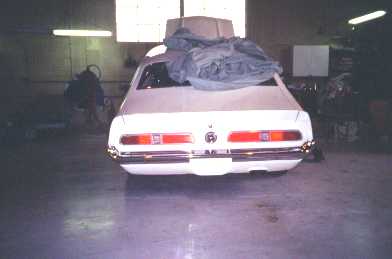
You can see the driver's rear quarter panel here it has a couple of minor surface flaws that I didn't like. Note the flared rear valence.
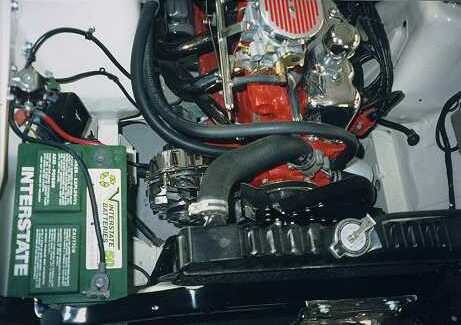
Remember, the engine was in the car, and the chassis had been fully detailed. An awful lot of time was spent just taping off the detailed work already completed! Whew!
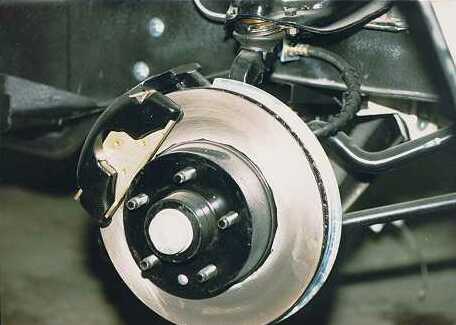
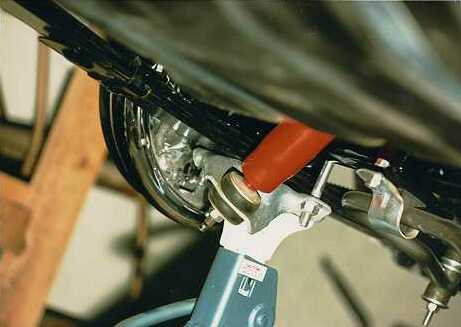
Front disk brakes were also added from a Granada. All new parts were added, and everything was detailed to the max.
The rear axle was treated to an Addco rear sway bar (brackets welded on, not clamped on!), genuine Koni shocks were added, the brake backing plates were chrome plated, a lot of parts were
Cadmium-1 and Cadmium-2 plated. The rear axle was sandblasted, ground, primed, sanded and then painted with three coats of catalyzed DuPont Centari.
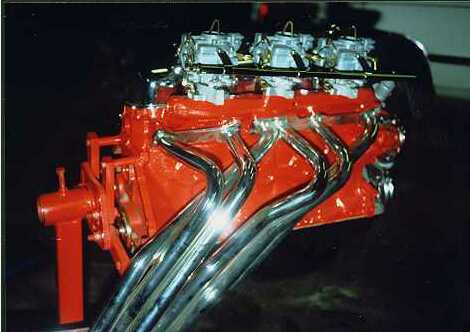
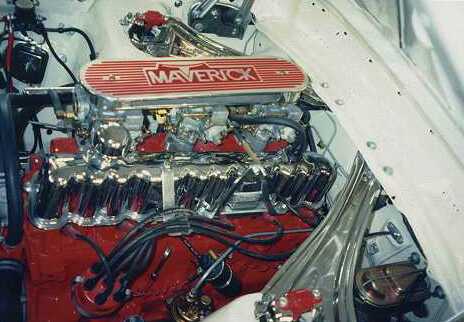
The engine was treated to a lot of work and some very expensive parts and machining (consult the article). The Clifford headers were
chrome plated. Check out the tri-power set up.
Here's the driver's side. The engine is painted with '56 Ford red.
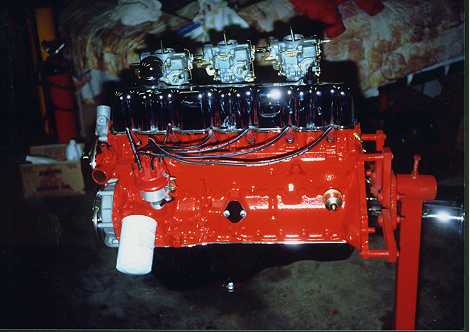
With the engine in the car, check out the detailing. The fuel log is custom made, the air cleaner was custom-machined by master
machinist Cedric Ozminski (thanks, Ozzie!). Assembly credit goes to noted restorer and mechanic Mike Smith.
Look at the awesome air cleaner! Mr. Ozminski pantographed a front fender "Maverick" script, and cut the air cleaner from a billet of
aluminum. We painted the top red, then machined off the ribbed area.
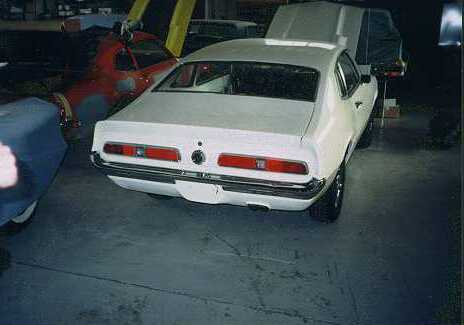
After I carefully buffed out the car (2000-grit 3-M sandpaper, followed by Finesse-It buffing, then hand polishing with Meguiar's No.3 and No.
7), I started to assemble the car. Check out the first-generation Mercury Bobcat taillights, flared rear valence, and the great paint job!
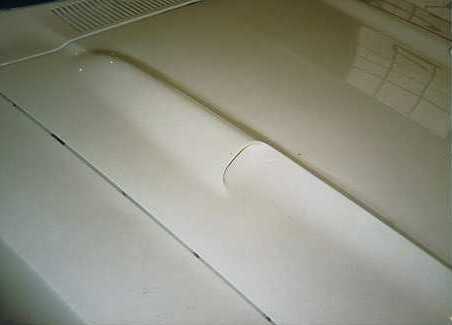
The Grabber hood was customized. The drop-in hood inserts were duplicated in sheetmetal and then welded to the body. These scoops
are open and work! These hood changes were a TON of work, but well-worth the result!
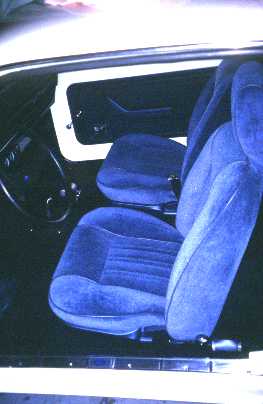
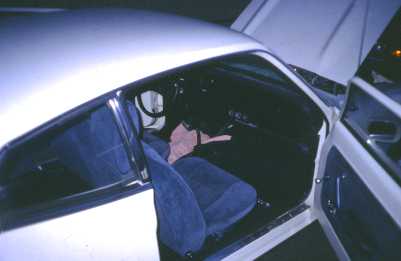
The interior was treated to custom work, too. LDO seats and the regular rear seat were covered in 1993 Lincoln Continental fabric (two
styles), as were the door panels, Auto Custom Carpet dark blue cut pile carpeting was used, the dash pad was painted black, the dash was painted dark (solid) blue, with dark-blue seat belts and
custom-embroderied carpets from The Maverick Connection. The headliner is a white napped fabric (kinda like a broadcloth). This interior is gorgeous! All new door rubber and door opening weatherstrip was installed.
Here's another shot of the interior. The metal part of the interior door, and inner rear quarter panels, as well as the rear bulk head,
were painted the same white paint as the body, but it was toned down with flattening compound.
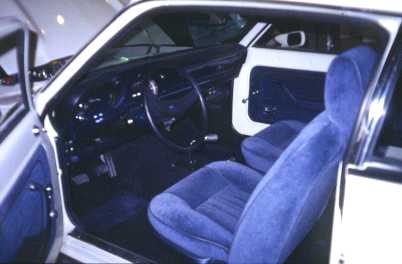
Here's still another photo of the interior. An aftermarket Ford steering wheel was added, as was a 3-gauge Ford Motorsports panel and
steering wheel mounted Motorsports tachometer. A Hurst Competition Plus controls a genuine Shelby Mustang close-ratio 4-speed!
A rare electric trunk release, procured from The Maverick Connection, was installed. It's really cool!
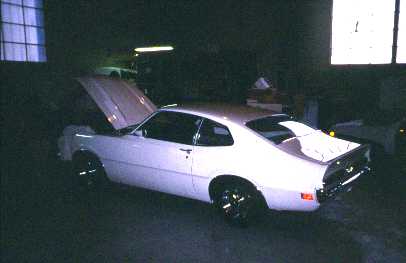
Here's the car right before its maiden voyage. Still to be added are NOS rocker panel moldings (with custom machined/reproduction clips).
Note the LDO chrome moldings on the top of the door and just below the rear quarter windows.
22. After tuning the carbs, adding new gas, double-checking the oil, and a little prayer, here I am driving the car for the first time. It ran well, and in fact ran very quickly, but the carbs are still way too rich.
The 4-speed really takes advantage of the high-strung engine; the exhaust sounds very exotic and foreign.
The first-generation Mercury Bobcat taillights just look like they were made for the Maverick. It is just hard to imagine why Ford didn't offer them!