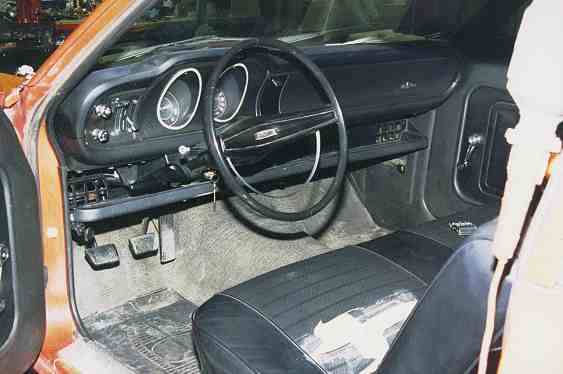
This is the baseline interior. Note the textured rubber floor mat, and the whole vinyl interior. Check out the package-tray mounted ignition switch. 2. While this looks pretty icky, this is AFTER a thorough wash job by me! While this
car was unmolested, it wasn't well cared for, either. The radiator leaked badly.
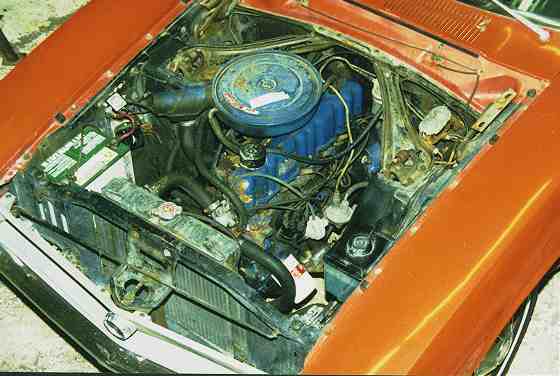
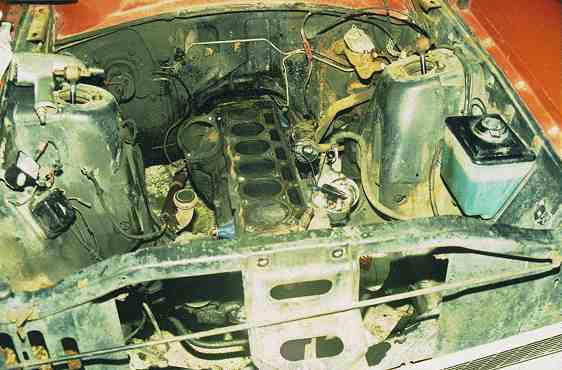
3. Here's a more complete shot of the engine. Note the quality of the decades-old paint: I just washed it and ran a buffer/polishing compound on the top of the fenders.
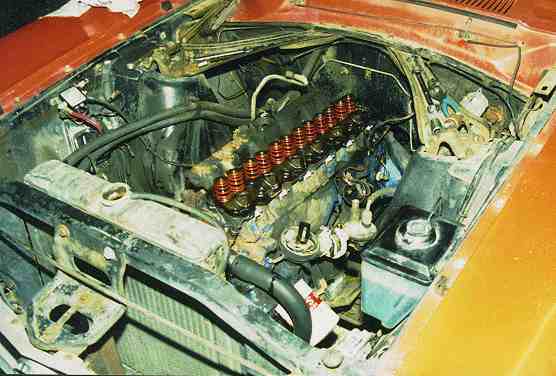
The hood has been discarded because it was, surprisingly, rusted at the leading edge just above the molding. 4. After draining down the radiator (which leaked pretty badly), Mike Smith pulled off the carb and valve cover. He expressed genuine surprise at what greeted him when
the cover was removed: this engine was exceptionally clean internally, which supported the excellent compression in each of the cylinders. 5. With the cylinder head removed, Mike again indicated his surprise when checking out the cylinders. There was almost no taper, and little carbon. At this time, Mike
decided that the short block did not need to be rebuilt. Photos 6,7 & 8 need to be rescanned... 6. With the engine out of the car, Mike could more completely check it out, pull the
pan, scrub down the block, install a new water pump, install fresh gaskets, a new distributor, a new coil, new wiring, and so forth. 7. While Mike was working on the short block, this pile of parts also received attention.
The starter was completely disassembled, the case was blasted back to bare metal and painted, and then rebuilt. The alternator was replaced with a factory fresh unit,
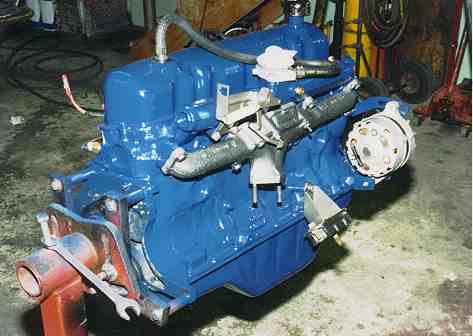
and other parts also were replaced or rebuilt. All the brackets were cleaned, blasted, and plated in Cadmium-2 or in gold irridate. 8. Check this out! Looks like a fresh engine, eh? The factory stock cam was replaced
with the mildest one found in the Clifford Engineering catalog - this just bumps up the horsepower and torque a bit, without disrupting a smooth idle, to make it more
pleasurable to drive the 170-powered car. The bell housing and transmission were also pulled, cleaned, painted, treated to new gaskets, and a new clutch was installed with a higher performance pressure plate. 9. Here's another view of the passenger side of the block. The factory exhaust
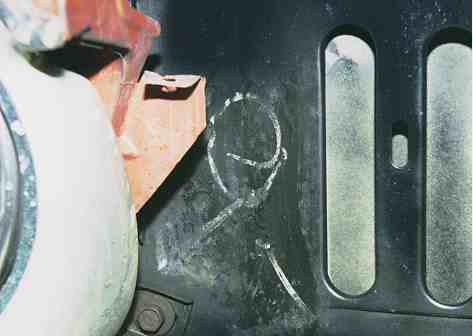
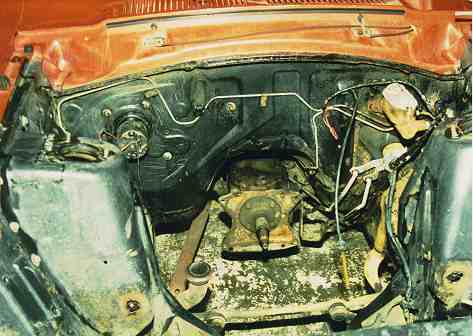
manifold was replaced because we discovered that the original one had a small crack on it around one of the ports. 10. Check out this factory grease pencil marking on the passenger front of the radiator support. A careful restoration would replicate this feature. 11. With the engine finished, Mike and I turned our attention to the engine
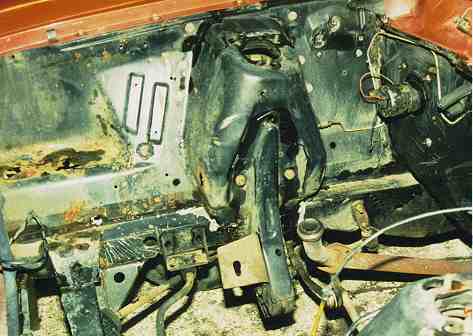
compartment. Here, the transmission has yet to be removed. The entire suspension was dropped out, cleaned, bad parts replaced, and then painted. Check out the crude
holes cut in the bottom of the shock towers with a torch by some jerk to get access to replacement upper A frame grease zerks could be greased. What an idiot. We
welded up the holes, and then machined the replacement upper control arm shafts to accept later model angled grease zerks. 12. Here's a shot of the passenger side. There was just a speck of rust through under the battery, and we welded it up then I finished off the entire area after stripping off
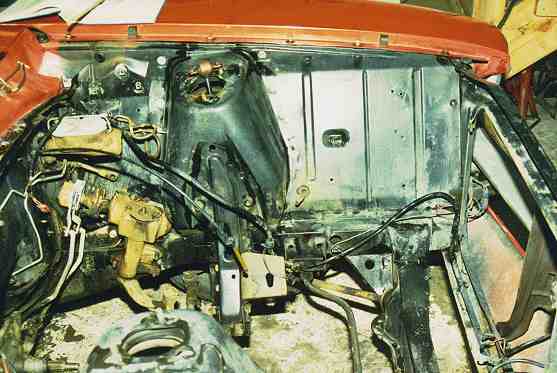
all the paint and treating the bare metal to DuPont Metal Conditioner. Note that the engine compartment was painted all black. 13. Check out how the black painted integrates into the orange paint of the cowl. Clearly, the body color was applied first, then some sort of black paint template was
used. Future restorers should pay attention to this detail.
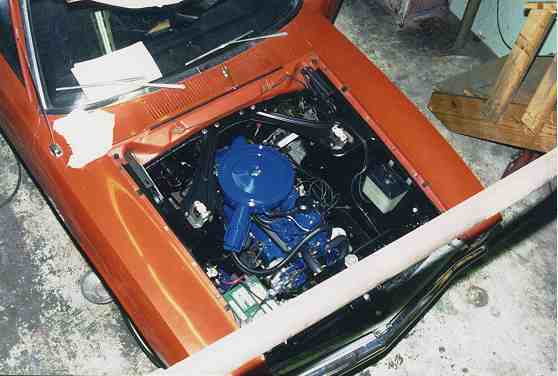
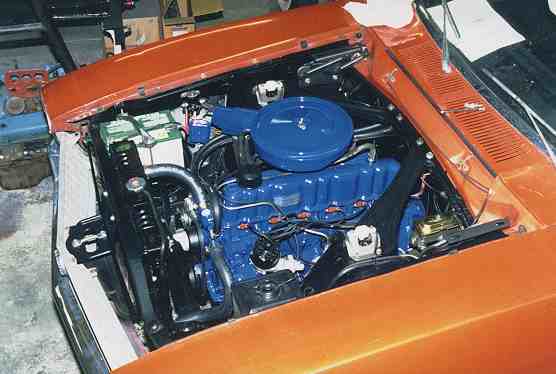
14. Here is a shot of the finished motor compartment with the fresh engine back in. It was a ton of work, but it looks great and the engine is terrific. It started up with no fuss, and runs smoothly. 15. Here's a shot from the driver's side. The hinges, and other similar parts, have
been painted with steel-colored paint, and other brackets and so forth were plated. Note the new master cylinder (with steel-painted base), fresh hoses and clamps,
recored radiator and painted radiator support, a new battery tray and new battery, and other details. It would be shame to pull this apart again and install a V8. 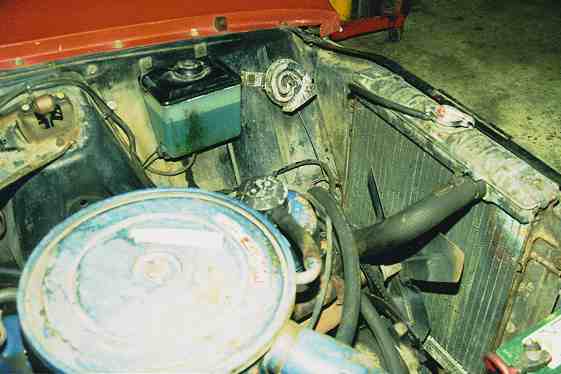
16. With the car back at my garage, I started to do some bodywork. The door was blocked out to remove some parking lot chips; small dings were worked out with a hammer and dolly. The right rear quarter panel has a moderate vertical crease the crossed the character line - it was difficult to remove without using filler. The front fenders are dented at the bottom, and will be replaced with NOS units purchased years ago. Similarly, the front valence is really crunched and will also be replaced with a NOS piece still in red oxide primer! Note that the 13" wheel/tire set up is still in place, and that a 1971 Grabber hood has been installed to replace the rusted original piece.
